
Our living room has no light in it.... not a light fixture to be found. After living here for a few months, I realized I was in SERIOUS need of a lamp. So I went to a lot of different stores trying to find the perfect lamp. Basically I couldn't find a lamp I really liked, and even if I could, they are REALLY EXPENSIVE!!!! I knew if I came home with a $100 lamp, The Mr. would have a little cow {only on the inside of course, because he could never show any emotion outwardly.}
ANYWAY...
We went a few more months without any light in our living room. It felt like we were pioneers, living in the dark days. Until one day when The Mr. insisted on stopping at a yard sale. Among our treasures was this lamp. 2 dollars. They even gave us a new light bulb for it, thank you very much. What a steal!
So it really started out as a creme color, which was just really gross. So I painted it black to hide all of the yuckiness, and guess what? It actually looked WORSE than it did originally. Yup. That's when I decided to mod-podge it. Why mod-podge? Because I love the stuff. I used fabric to wrap the base and left the lamp shade alone. {I really did want to mod-podge the lamp shade, but since we need this lamp for lighting, and not just for decoration, I thought putting more fabric on the shade would lesson the light.}
The "before" picture

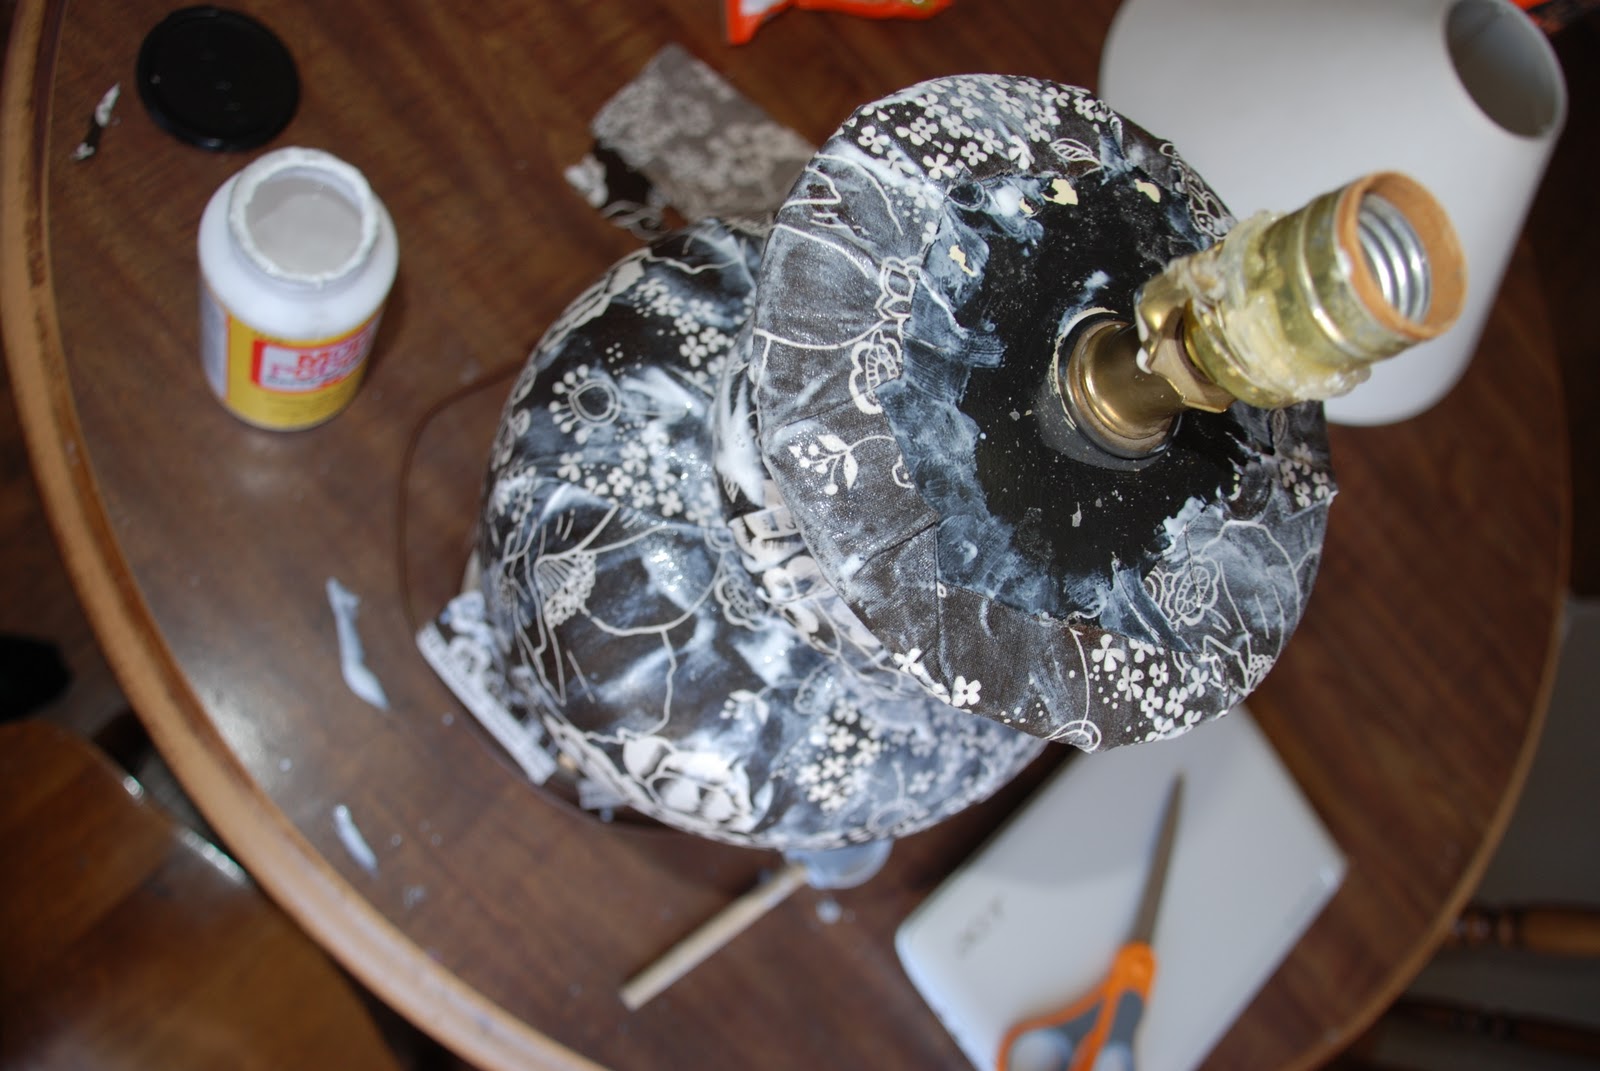
I started off by spreading a good amount of mod-podge on the lamp.

Then I took my fabric and started wrapping it around the lamp. {I had no idea how much fabric I needed, so I just cut it about 4 inches taller than the lamp and 4 inches more around than the lamp. I had to cut some off in the end, but it's better to have extra than not enough.}

When you're doing this, make sure you STRETCH it. That's why it's best to use fabric rather than paper, because you can stretch and fold your fabric.

When you've wrapped most of the lamp, you'll have to start tapering it at the top and bottom. I just made small folds in the fabric and then mod-podged over them.

It really won't stay tight until it dries, so I put a rubber band around the tapered part to hold the fabric.

I only had one rubber band, so I used a hair thing to go around the other tapered part. By the way, I use hair things for EVERYTHING!!!! Mostly because I don't usually have rubber bands around the house. Maybe I should get some since they are much cheaper than hair things.
Ok, back to the subject. Spread a good layer of mod-podge over the top of the fabric.

And, like I said, you'll have to fold and stretch. The more curvature you have in your lamp, the more you'll have to do this.
Then I took an exact-o knife {you could use a utility knife} to cut off the excess.

I didn't get pictures, but I wrapped some ribbon around the tapered parts and the bottom. Mostly because the tapered parts weren't perfect, and I cut it a little uneven on the bottom, so I wanted to hide the imperfections.
The finished product:

And here is how to do the ribbon-wrapped candles. {I bet you could probably figure it out on your own.}
I got these candles at Ikea {I LOOOOVE Ikea, except for it takes an ENTIRE day to go through that store, yuck.} The candles are 8, 6, and 4 inches tall.

I burned them down a little bit because although the candles will strictly be used for decoration only, I didn't want them to look like they were brand new. I wanted them to look like they have had some good use. {I know, it's silly.}

I also got the simple candle plate at Ikea. {$1.99}. The ribbon is from Hobby Lobby {My truly favorite store. }

So, wrap your ribbon around your candles and tie a pretty bow. Make sure to melt {not burn} the edges with a lighter or a match, so they don't frey. I also put a dab of hot glue on the ribbon after I tied it so it would stay tied. Then I hot glued the ribbon to the candle.

And here it is. I love long tails, so I left mine really long. But you could trim them if you want.

And here it is again.

I got that green table runner at Ikea, it was 99 cents. It's actually about 5 feet long, but I just folded it up. I didn't want to cut it cause I might want to use it later for something else. And the table was also an Ikea steal for only 7 bucks!
Total, this project took about 1 hour and 3 minutes. An hour to do the lamp, and 3 minutes to wrap the candles.
Total cost: $22.50
Lamp $2
Fabric $5 {Hobby Lobby}
Candles $4.50 for all 3
Candle plate $1
Table runner $1
Table $7
{Already had the mod-podge and the ribbon.}
So the WHOLE reason I mod-podge the lamp was so it could match THIS gem. I'll share how I re-did it in a few days.
So the WHOLE reason I mod-podge the lamp was so it could match THIS gem. I'll share how I re-did it in a few days.


No Way! I can't believe you mod-podged a lamp! It looks awesome. I would never imagine you could do such a thing but it really turned out nicely.
ReplyDelete